This page will be an ongoing write up about an item that has been out for awhile, but I haven't seen many articles about which may mean I haven't kept up to date with this version of Astrophotography(most likely) or I'm just oblivious. This is about the Revolution Imager version R2. This is a video camera that can be used for terrestial objects such as birds or other things that are viewed from a distance and for imaging both planetary and lunar objects. What tends to set this apart from other cameras is its ability to give you views and images of deep space objects too.
I bought the R2 version from Skies Unlimited in Pottstown, Pa. A great bunch of guys to know and talk to. They led me in the right direction. I told them I was looking for a way to show solar images from my Lunt 80mm at an Earth Day gathering at the local park. This is why I was introduced to RI. I proceeded to buy the basic kit, the extra heavy duty battery and the WiFi unit. I thought I might be able to use the WiFi unit to broadcast my image on my laptop. That fell apart quickly, but more on that later.

The basic kit comes in a zippered nylon case for storage.

It all fits nice and neat when you get it, but I am never able to get it to fit back nice and neat after using it.😀

You get the camera, a portable 7" LCD monitor, a battery with charger, a 0.5 focal reducer, a UV/IR filter,a remote for the camera and all cables necessary. For a limited time they are including a USB capture device for free. This is normally an accessory.

(USB capture device is pictured above)

I bought the extra heavy duty battery to use for longer imaging sessions(pictured above) and the WiFi unit(pictured below).

They recommend that you set it up during the daytime and practice. I strongly recommend that idea. Doing this will allow you to get use to the arranging you have to do with all the cables. When I was setting it up it reminded me of my old stereo days trying to manage all the cords for my tape decks, turntables, receiver, VCR and other little add ons I had. Quite the rats nest. The daytime setup allowed me to find out what would work and what wouldn't for me in preparing for the solar outreach gathering on Earth Day. Also, I had to set up inside since we had just gotten done with the Blizzard of 2017 and it was extremely cold and windy. All testing was done from inside and through a window. My backyard butts up against a large cemetery on a big hill overlooking the town(I know...let the jokes begin...neighbors are really quiet...watch out for those "ghost" images. I've heard them all, but there are no buildings or trees in my area to block the sky and the sky is open from the North all the way around to the East and this is the darkest part of my sky. If you click on the tab "My Telescopes" you can see what I'm talking about a little better. Lastly, the only thing alive walking around out there, other than the occassional walker/jogger, are the deer, like the one below, which I feed).

I use several large monuments during the day to roughly line up my guide/ finder scopes with the telescope view and then refine it at night. When I began testing you will see I used a large monument located about .3 of a mile away across the cemetery.
I decided to set up all three ways I might use to show images to show you the difference.
First, the basic setup. I found the cable with the DNC pin and hooked it up to the camera. The other end plugged into the yellow connector on the 7" monitor for the video feed.


I then took the power cord which in the shape of a "Y" and using the single end plugged it into the camera and then plugged the appropriate connector into the battery cord and the other half of the "Y" into the monitor and then turned on the battery. This "Y" cord is short and may present a problem later when hooked up outside. I understand there is a 25 foot extension cord available and will have to look into that. If all connections are made the red light on the camera comes on and monitor turns on. I had previously lined up the scope with the monument visually so the item came into view, but was extremely out of focus. I didn't have enough back focus, so I used a 2" extension with the camera and everything was fine.
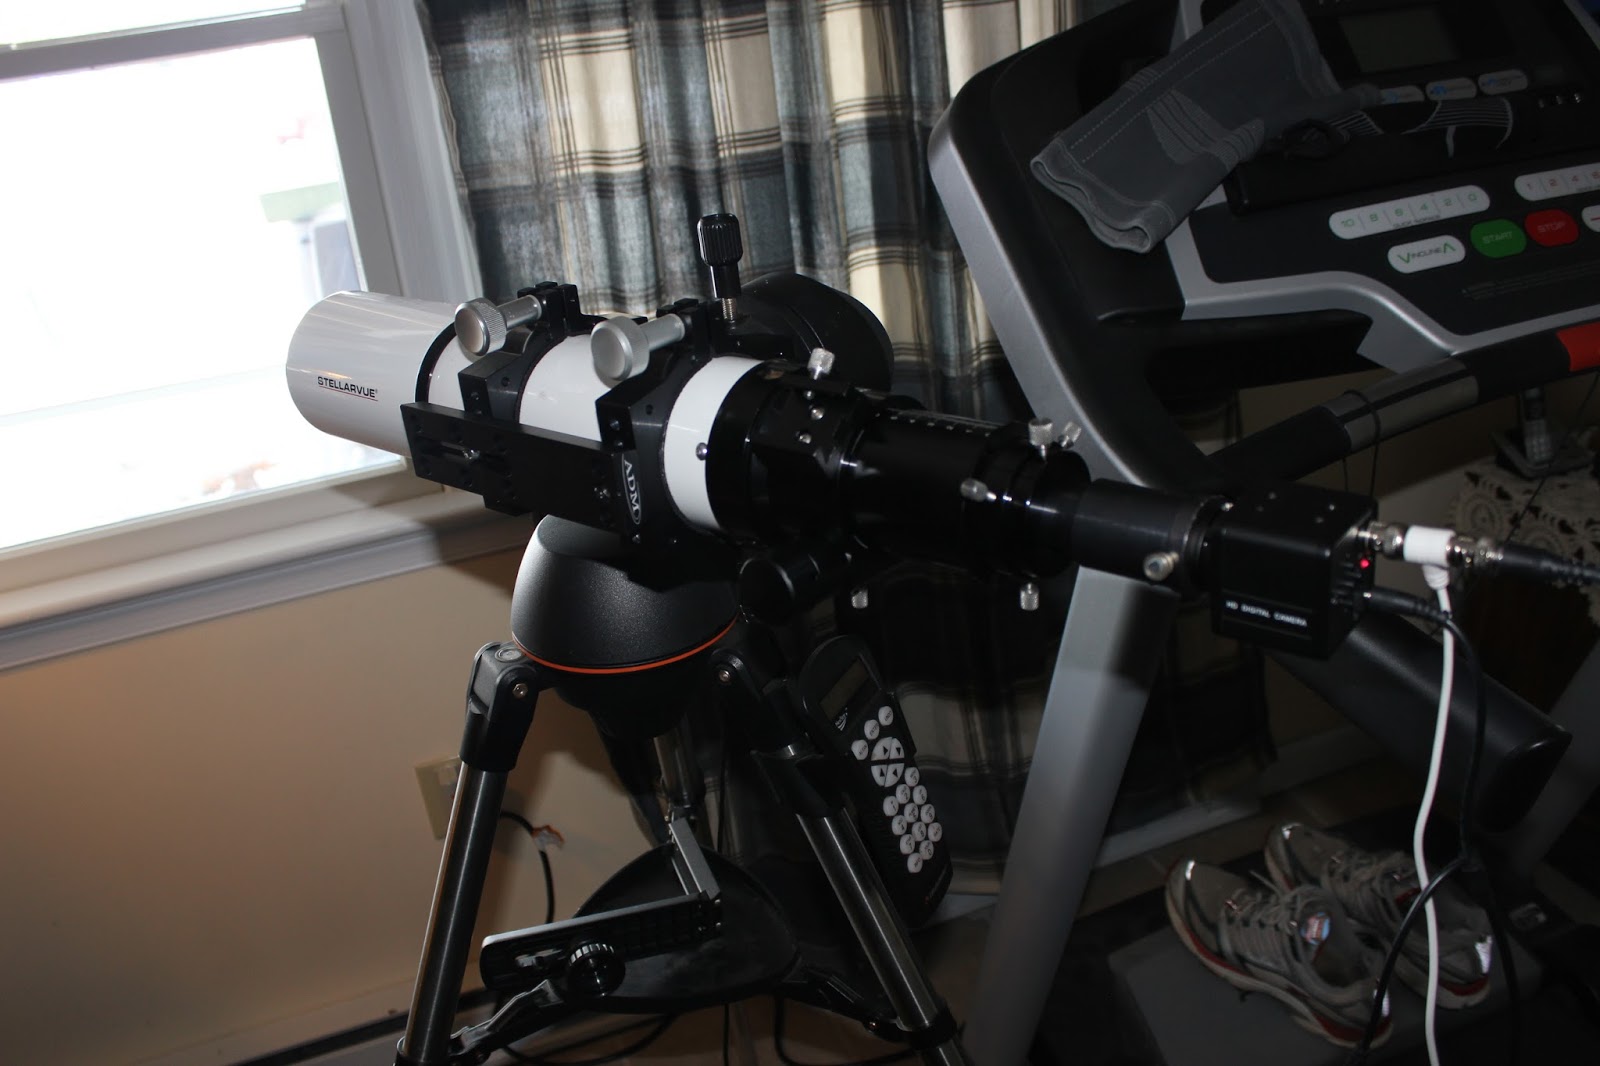

Sorry about the treadmill in the pic. I didn't feel like moving it. This was the result. Remember that this is a video and those flags were really flapping which you will see in a short video link later in the article.

Second setup was with the WiFi. I unhooked the monitor and plugged the WiFi into the power cord.

The blue light comes on to show you that it has power. You then download an app for your smart phone or tablet(Android or IOS works) called "WIFIAV". I put it on an Android tablet. Before opening the app go to your settings and find the WiFi for the app and select it as your WiFi. Then open your app and the image should show like below.

I decided this was better for more people to see I wanted a larger image if possible , so I decided to use the WiFi to put the image on my laptop.
Third setup was with the laptop and within a minute I realized I had had a brain malfunction. the WiFi won't work on my laptop because it doesn't use apps. It was time to learn the USB capture device. It wasn't really difficult. You plug it in to your USB on the laptop and it loads the driver. the company tells you to use SharpCap as the capture program. SharpCap is free and since I already had it loaded and was looking for an excuse to use it I simply opened it up went to the tab marked "camera" and found "USB 2.0 camera" and clicked on it and up came the view from the camera.


This is the setup I plan to use for the solar outreach on Earth Day. Next up will be using it to try and capture some images and live feed of the Sun and Moon before graduating on to DSOs. The link below will take you a short 12 sec video showing the video feed from the camera.
Short video showing live feed from Revolution Imager R2
This is an ongoing article and more will be added as time and weather permit. Look at the RI tab and see if it says "Updated" with a date to tell if anything has been added since your last visit.
Clear Skies!
Update 5/3/17
Finally got a chance to do some imaging with the RI R2. I am not going to say I got this down pat because I don't. I have a lot to learn so this will still be an ongoing blog.
Tonight I decided to shoot the Moon with the RI R2 and my SV 130 mm on my Hypertuned CGX. I used Sharp Cap as the capturing platform. The camera can capture incredible detail as you will see in the images below. Afterwards I realized I should have probably used the IR cut filter and the .58 FR. I'm still learning this new technology. I tried to get M3, but I am still stumbling around trying to find the correct settings for a DSO object. The next time I will concentrate on just DSO objects. See images below for the Moon.


I will update as I can. Clear skies.
Update 6/1017
Last night I attempted to use the R@ as an All Sky camera. I had to use a ball head on a USA Pro tripod to be able to turn the camera skyward.

After that I set up the camera to the computer using the Capture device which plugs into a 2.0 USB plug. I used a USB hub because of using an external drive to store the captures.

I then opened Sharp Cap, a freeware program, to obtain the video. I am still learning the settings and did not quite have them right, but I did learn from my mistake. A picture of what it looked like on my screen follows.


As you can see I was practicing before dark with the settings. the final thing to do was to make it the computer dew proof as much as possible. that was accomplished as you can see.


The fan is aimed at the all sky lens to keep dew/frost from forming on it since dew/frost cannot form when there is moving air(which is why they will use fans in orchards when frost is feared). We affrectionately call this Dave's Dew System 2000. If interested we will sell you one for $99.95.😂 Infomercial by Uncle Ron Shawley is available to watch in the tabs on this blog's home page.😉
The results were a one hour video only due to clouds ruining everything. The Full Strawberry Moon wasn't a help either. I have posted a speeded up video of that result below. In fairness to the R2 I will wait till dark skies return and try again. Tonight I hope to use the R2 on Jupiter and/or the Ring Nebula.
Update 6/12/17
Last night I tried the R2 on Jupiter and M57, the Ring Nebula. I am use to seeing DSLR images so these processed images are not quite up to my standards, but in fairness the seeing was hazy and I am still not use to the different settings and what works best. That will have to come with practice.


The neat part of this whole unit is the ability to show on a screen(monitor, laptop or by wifi) to a group of people at one time. There would be no need to crowd around an eyepiece or take turns viewing. Family gatherings, picnics, astronomy classes and public outreach encounters are just some of the possibiities. the unit is available with a small DVR to record you viewing if you don't want to use a laptop. I will update this article from time to time when I have perfected my technique or tried some of the new accessories available, but i must move on and get some the other articles that are in need of an updating done.
M57 Ring Nebula 5 minute AVI file from last night(you don't need to watch all of it😁).
A one minute(really it is) video of Jupiter. This a raw video direct from R2
Update 6/26/17
Video of last night's sky. 4 hours compressed down to 3'58". Taken with the R2 Revolution Imager. Getting better with the settings, but not quite there yet.
6/25/17 Night sky with R2
I was able to get the RI2 out tonight to try and get better capturing DSOs. Clouds were starting to show so I spent my time with an old friend M27 before shutting down for the night. I must keep reminding myself this is not a DSLR and is not really meant for imaging, but for live viewing. To show results here imaging is what needs to be done. My plan was to learn more about the adjustments, so I spent most of my time trying different combinations. i took snapshots of the result and shown below is the unprocessed result.
Update 7/16/17
I was able to get the RI2 out tonight to try and get better capturing DSOs. Clouds were starting to show so I spent my time with an old friend M27 before shutting down for the night. I must keep reminding myself this is not a DSLR and is not really meant for imaging, but for live viewing. To show results here imaging is what needs to be done. My plan was to learn more about the adjustments, so I spent most of my time trying different combinations. i took snapshots of the result and shown below is the unprocessed result.


This is how it looked on my laptop using Sharp Cap.
Below is a slightly processed version of the same image.

Very nice web site
ReplyDeleteThank you. I try.
DeleteVery nice website. May I ask if you were ever able to use the R1/R2 to live image the Sun in H-alpha? If so, did you have an issue with achieving focus (I have) and what settings did you use? Thank you for the time and effort you devote to this website.
ReplyDeleteI tried once, but couldn't get the exposure or the focus to cooperate. I moved on after that to what you see in the article. Sorry I can't help, but I did see videos on YouTube so I know it can be done. You can also go to Cloudy Nights and find the forum on EAA Electronic Assisted Astronomy and start a topic and ask for help there.
ReplyDeleteClear skies.
Btw...thank you for the compliment.
ReplyDeleteDave
Hi Dave,
ReplyDeleteYour Moon pictures are awesome! I just bought the Revolution R2 and have been trying to focus the moon so my grandchildren can see it on the monitor. All I'm able to see is a white screen and no image of the moon. Do you have a cheat sheet of settings for the moon? I am using a Celestron Celestar 8" that I am using.
Thank you
John
https://www.revolutionimager.com/blogs/news/amazing-in-depth-revolution-imager-review-by-mike-weasner
DeleteFrom R2 website
Thanks Dave, I missed the second link; I'll give those settings a try once the clouds lift.
ReplyDeleteHi Dave, great article here. One question, in image #3 which shows all the gear laid out, there is a wireless remote looking thing all the way to the right, is that what that is, and how does that work? Thanks in advance!
ReplyDeleteIf I remember correctly it's a remote for the monitor to adjust different settings. To be honest I never used it. Didn't need to. Thanks for stopping by.😀
ReplyDeleteI appreciate it, Dave!
ReplyDeleteThis comment has been removed by the author.
ReplyDeleteIt's a wireless remote for the lcd monitor.
ReplyDeletehttp://www.weasner.com/co/Reviews/2016/Revolution_Imager/index.html
Fantastic information, I have been thinking of getting this camera, and seeing your review, which is great, I'm going to get one, I live in South West France, and my nights are dark,👍
ReplyDeleteGreat review, I just bought this system and anxious to try it through my C8 SCT and my RC6.
ReplyDeleteVery nice. I'm going a bit wacky trying to figure out what all the settings mean.
ReplyDeletePS: I could never get it neat back in the case either. :-)
ReplyDelete