TPO Ultrawide 180 f/4.5 Astrophotography Lens and Guide Scope
Peter Detterline
Dave asked me to test out a new telescope system for wide field astrophotography
applications. The TPO Ultrawide 180
f/4.5 Astrophotography lens and guide scope available from ,https://optcorp.com/products/tpo-ultra-wide-180-astrophotography-lenshas
been getting a lot of rave reviews. I’m going to talk about the setup using an
EAF focuser and use with both DSLR and ZWO cameras .
Included Items:
TPO UltraWide 180 Astrophotography Lens
Three-Element Reducer with Reducer Extension Tube
Extension Tube 1
Extension Tube 2
1.25" Adapter
Tube Rings
Vixen/Finder Dovetail Plate
Arca-Swiss Dovetail Plate
Dovetail Stalk
Hex Key
The focus on such a small fast system is particularly sensitive. So taking focus issues out of the equation is
a necessary and important step. Highly
recommended is an EAF focuser will allow you to use the ASIair software routine
to automatically focus the telescope. Deep Sky Dad makes a kit available at https://deepskydad.com/autofocuser/askar180/eaf. Askar is the European equivalent of the TPO,
so don’t worry it will fit the lens. Follow the instructions carefully;
space-wise everything is going to be a tight fit. Pay special attention to
tightening the rings for maximum and minimum focus. Watching the video is a big help in
understanding how the unit works.
The biggest issue you will face is that The EAF rings will have to be
loosened and adjusted to change from the DSLR to the ZWO configurations due to
changing the extenders. This takes time
and there isn’t a short cut.

Setup for DSLR
The camera used was a Canon 60Da outfitted with a clip in STC light
pollution filter. It needs to setup
fairly tight to the lens system so use the shortest extender to connect it to
the camera. In this setup the guide
scope was connected to the shoe on top of the camera. This shoe mount was purchased for $40 from
Idea Engineering and can be found at: https://www.ideaengineering.us/?ec_search=IDEA-VFDSLR+V4
. The ZWO 120 mini does a wonderful job
as a guide scope with this setup.
Images
As expected, the field of view is very wide with the DSLR. The Orion Nebula and the Horsehead are both
in the field as it extends about 4.5°
x 8.5°. The exposure length is 180 seconds. The summer Milky Way would be a great target
with this setup as would the Veil and North American Nebula.
Setup for ZWO
The setup for the
ZWO camera also needs to include the Starizona filter slider, https://starizona.com/products/starizona-filter-slider-complete-system, so various 2” filters can
be added to the system. It is possible
to screw the filter onto the end of the lens, but this is not ideal; the filter
should be as close to the camera as possible.
Using filters is an essential feature for our suburban skies at
home.
The EAF position on the top doesn’t make this an ideal setup for
guiding. The solution we came up with
was a side by side system with a guide scope on the opposite side along with
the ASIair Pro. This allows access to both systems and makes cord management
easy.
Images
We start with the Heart and Soul Nebula to get an idea of the field of view
which is about 3° x
5.5°. The picture is a combination of 10 stacked
images at 180- second exposures each using the L-extreme filter.
The same setup was also used with the California Nebula. The picture is a combination of 10 stacked
images at 180- second exposures each using the L-extreme filter.
The Elephant Trunk Nebula, IC 1396.
The picture is a combination of 10 stacked images at 300- second exposures
each using the L-enhance filter.
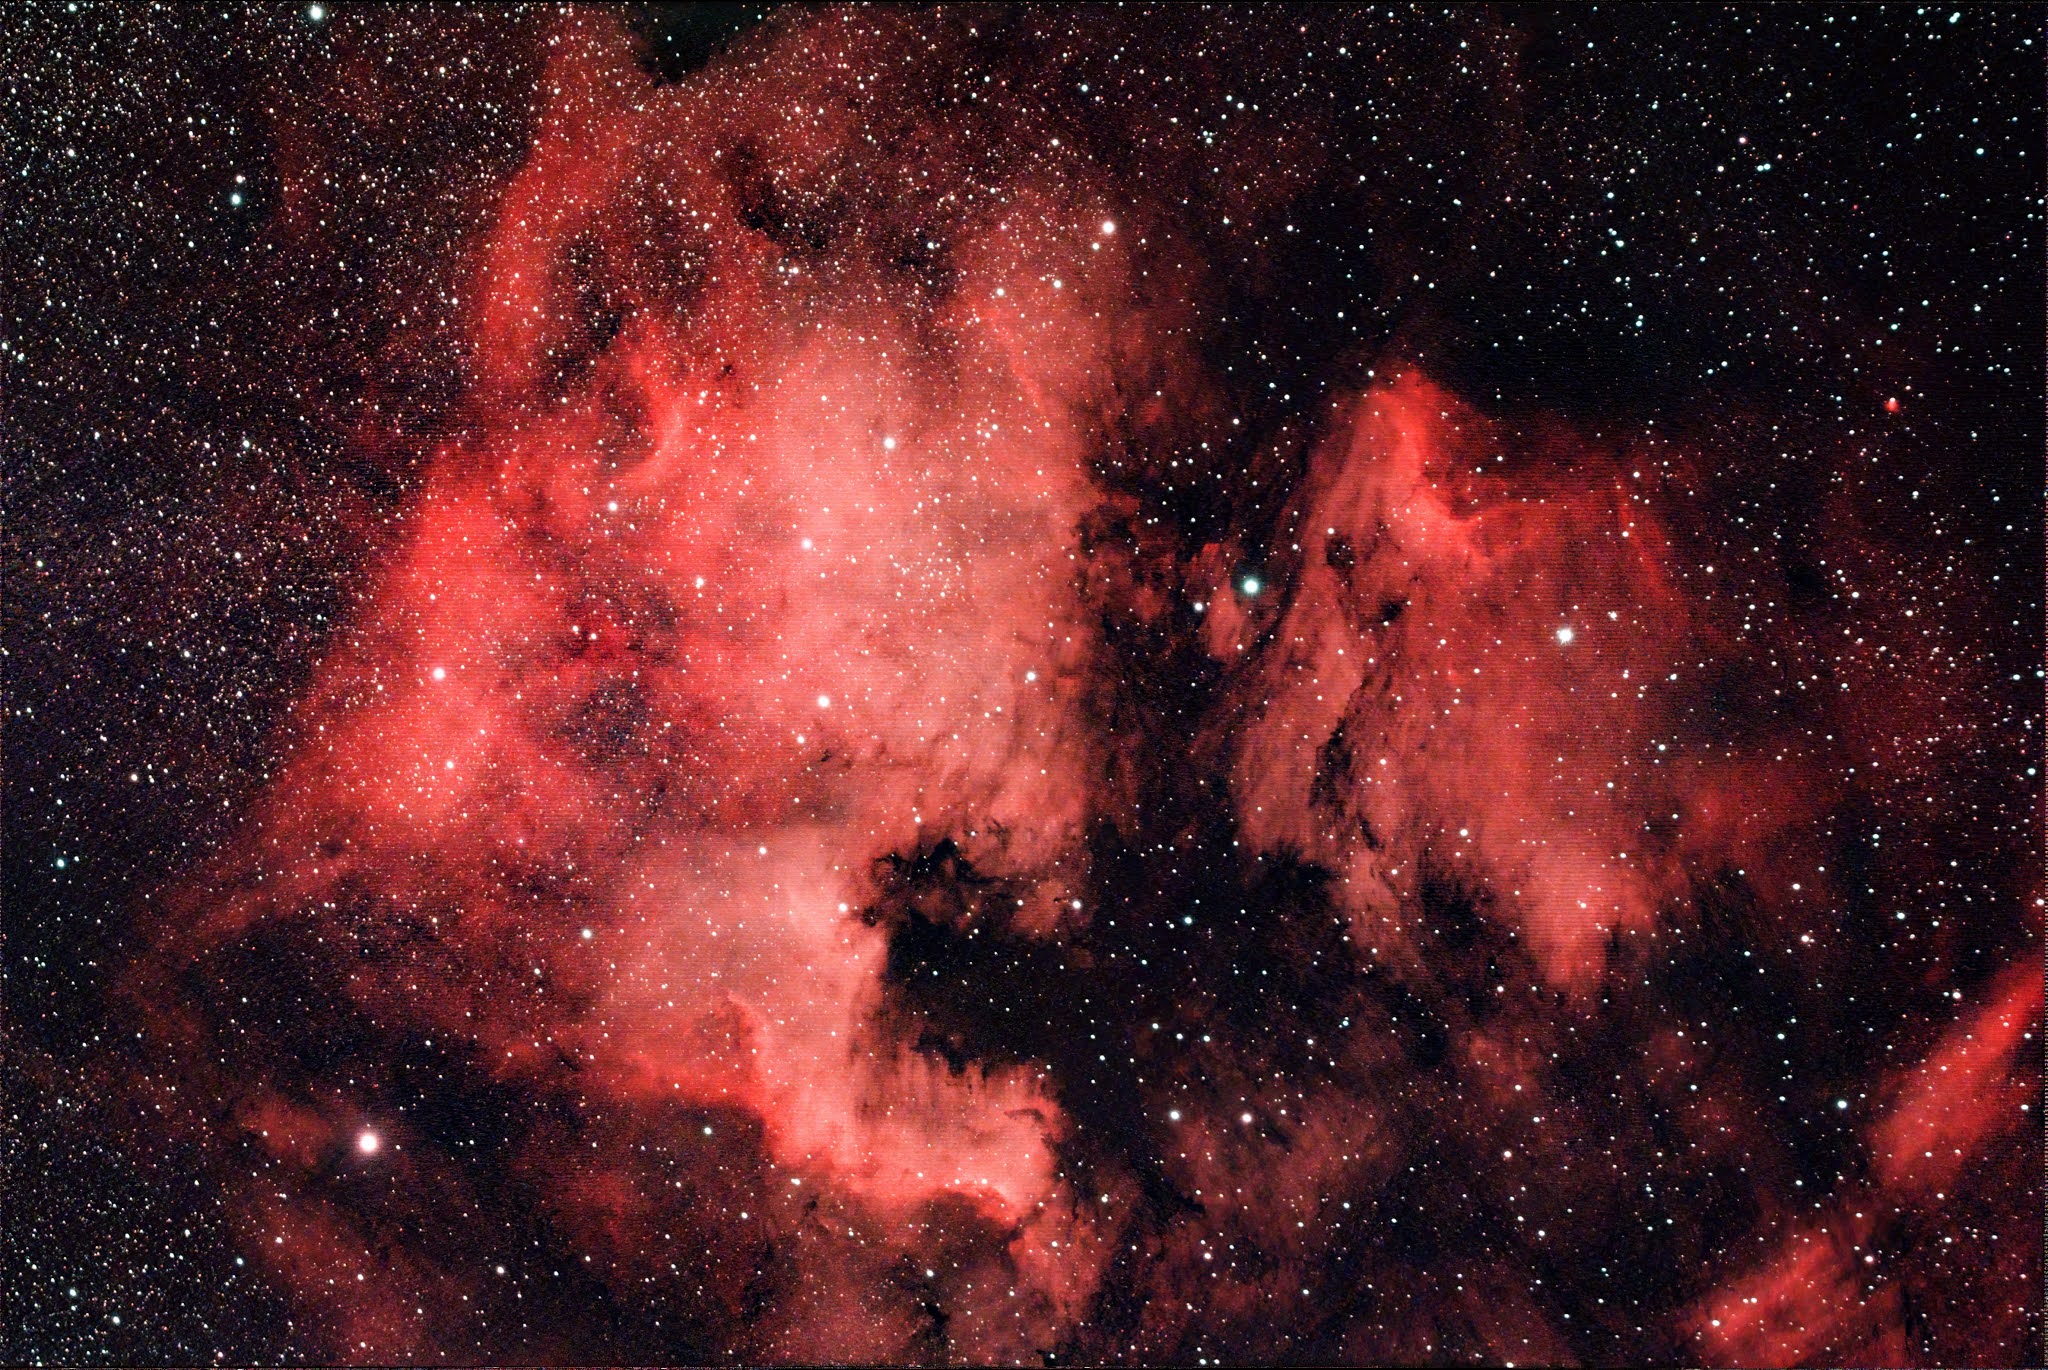
The North American and Pelican nebulae taken with an L-Extreme fiter. This is a combination of 20 stacked images at
300 seconds.
Conclusion
This is a beautiful lightweight setup for travel. However, the EAF I feel is essential for good
focus and ease of operation and that adds considerable weight and bulk. The setup for the ZWO camera with the side by
side system is not ideal for air travel; there are just too many
components. For traveling, the Canon
DSLR would be more self –contained and you could get all the components easily
in carry-on luggage.


Thank you for posting this article with a lot of details. I have a question about your DSRL set up. In the picture for the DSLR set up, what did you use below the two tube rings? Did you use the included Arca-Swiss Dovetail Plate? When I tried to do that, I found that the plate is a bit too long and it touches either the focus ring on the TPO side or T-ring on the camera side. I wonder if you used a shorter plate. If you did, could you tell me what that plate is.
ReplyDeleteMoreover, I also see another larger plate at the very bottom in the picture. Could you tell me what that is and where to get it? I'm not familiar with various mounting parts/accessories and my questions may be a bit silly. If you can bear with me and answer my questions, I'd be very grateful.
The Swiss arcade base was used and attached to a 7 inch vixen base from ADM accessories. This was used so we could mount it to the side by side also from ADM.
DeleteThis comment has been removed by the author.
DeleteThank you for the reply.
DeleteThis comment has been removed by the author.
ReplyDeleteNice page with useful updates and resources. It’s always great to discover blogs that share interesting content and helpful links. As an astronomy enthusiast, I also enjoy exploring topics related to ZWO astronomy cameras and astrophotography equipment, which make capturing deep-sky objects and planetary images much easier for beginners and professionals alike. Looking forward to more posts here.
ReplyDelete